How to perform a self - test on a DC dielectric hipot tester?
Sep 23, 2025
Performing a self - test on a DC dielectric hipot tester is a crucial step to ensure its accuracy, reliability, and safety. As a supplier of DC dielectric hipot testers, I understand the significance of this process for both our customers and the proper functioning of the equipment. In this blog, I will guide you through the steps of conducting a self - test on a DC dielectric hipot tester.
Understanding the DC Dielectric Hipot Tester
Before diving into the self - test process, it's important to have a basic understanding of what a DC dielectric hipot tester is. A DC dielectric hipot tester, also known as a DC high - potential tester, is used to test the insulation integrity of electrical equipment. It applies a high DC voltage to the equipment under test and measures the leakage current. If the insulation is in good condition, the leakage current will be within an acceptable range.
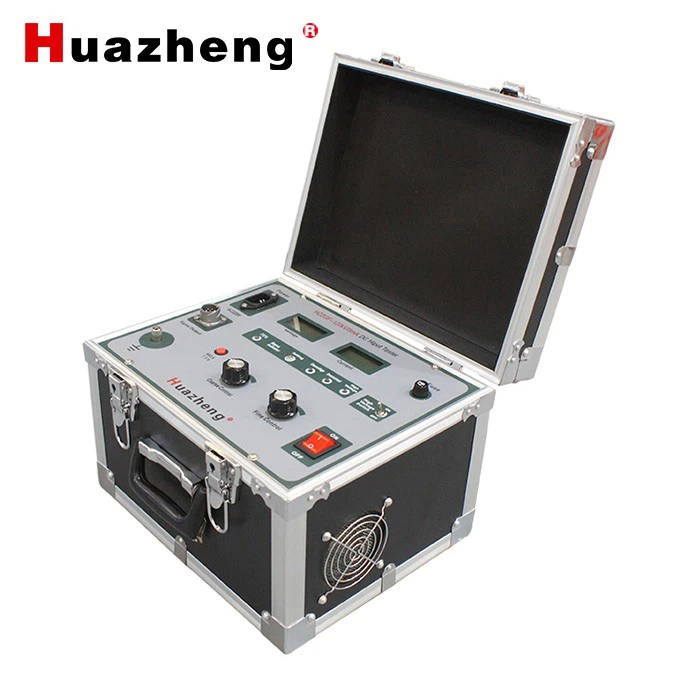
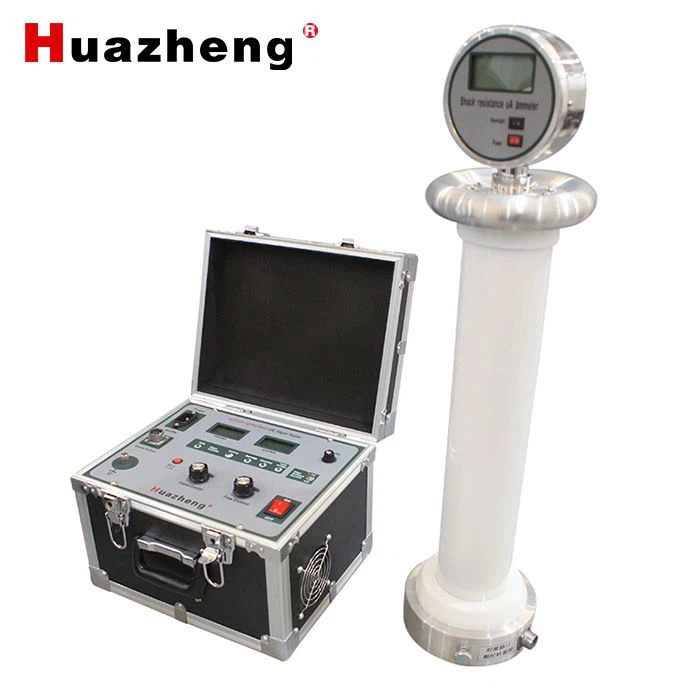
Our company offers a range of high - quality DC dielectric hipot testers, such as the 300kV 2mA High Precision DC Hipot Test Set, the 100KV 5mA DC Hipot Tester, and the High Accuracy 400kV 5mA DC Hipot Test Set. These testers are designed to meet the diverse needs of our customers in different industries.
Pre - test Preparations
- Inspect the Tester: Before starting the self - test, visually inspect the DC dielectric hipot tester for any physical damage, such as cracks, loose connections, or damaged cables. Ensure that all the controls, switches, and displays are in good working condition.
- Check the Power Supply: Make sure the power supply to the tester is stable and within the specified voltage range. Use a reliable power source, and if possible, use a voltage regulator to protect the tester from voltage fluctuations.
- Verify the Test Leads: Check the test leads for any signs of wear or damage. The test leads should be properly insulated and have no exposed conductors. Ensure that the connectors on the test leads fit securely into the tester and the equipment under test.
Step - by - Step Self - test Procedure
- Set Up the Tester: Place the DC dielectric hipot tester on a stable and insulated surface. Connect the power cord to the appropriate power outlet. Turn on the tester and allow it to warm up for a few minutes to stabilize the internal components.
- Select the Test Parameters: Depending on the model of the tester, use the control panel to select the appropriate test voltage, test time, and current limit. For the self - test, you can start with a relatively low test voltage, such as 10% of the maximum rated voltage of the tester.
- Connect the Test Leads: Connect the high - voltage test lead to the high - voltage output terminal of the tester and the ground lead to the ground terminal. For the self - test, you can short - circuit the high - voltage test lead to the ground lead using a suitable shorting device. This will simulate a zero - impedance load.
- Initiate the Test: Press the start button on the tester to initiate the test. The tester will start applying the selected test voltage to the short - circuited leads. Monitor the display of the tester for the applied voltage and the measured leakage current.
- Check the Results: In a properly functioning tester, when the high - voltage test lead is short - circuited to the ground lead, the measured leakage current should be very close to zero. If the measured current is significantly higher than zero, it may indicate a problem with the tester, such as a short circuit inside the tester or a malfunctioning current - measuring circuit.
- Test at Different Voltages: Repeat the test at different test voltages to ensure the accuracy of the voltage - generating and current - measuring circuits. You can gradually increase the test voltage in small increments, up to a maximum of 50% of the rated voltage of the tester. At each voltage level, check that the measured leakage current remains within the expected range.
- Check the Timer Function: If the tester has a timer function, set a specific test time and initiate the test. Make sure the tester automatically stops the test after the specified time has elapsed. This verifies the proper functioning of the timer circuit.
Post - test Checks
- Turn Off the Tester: After completing the self - test, turn off the tester and disconnect the power cord from the power outlet.
- Inspect the Test Leads Again: Check the test leads for any signs of overheating or damage that may have occurred during the test. If any damage is found, replace the test leads before using the tester for actual equipment testing.
- Record the Test Results: Keep a record of the self - test results, including the test voltages, measured leakage currents, and any observations or issues encountered during the test. This record can be used for future reference and to demonstrate the proper functioning of the tester.
Troubleshooting
If the self - test results indicate a problem with the DC dielectric hipot tester, here are some common troubleshooting steps:
- Check the Connections: Ensure that all the connections, including the power cord, test leads, and internal connectors, are secure. Loose connections can cause inaccurate test results or malfunctions.
- Inspect the Fuses: Check the fuses in the tester. If a fuse is blown, replace it with a fuse of the same rating. A blown fuse may indicate a short circuit inside the tester.
- Contact Technical Support: If you are unable to identify or fix the problem, contact our technical support team. Our experienced technicians can provide further guidance and assistance in diagnosing and resolving the issue.
Importance of Regular Self - testing
Regular self - testing of the DC dielectric hipot tester is essential for several reasons:
- Safety: A malfunctioning tester can pose a safety risk to the operator and the equipment under test. By performing regular self - tests, you can ensure that the tester is functioning properly and will not apply excessive voltage or current during actual testing.
- Accuracy: Over time, the internal components of the tester may degrade, leading to inaccurate test results. Regular self - testing helps to detect any changes in the performance of the tester and allows you to take corrective action before using the tester for critical equipment testing.
- Compliance: Many industries have specific regulations and standards regarding the use of electrical testing equipment. Regular self - testing and maintenance of the DC dielectric hipot tester can help you comply with these regulations and standards.
Conclusion
Performing a self - test on a DC dielectric hipot tester is a straightforward but important process. By following the steps outlined in this blog, you can ensure the proper functioning of your tester and obtain accurate and reliable test results. Our company is committed to providing high - quality DC dielectric hipot testers and excellent customer support. If you are interested in purchasing a DC dielectric hipot tester or have any questions about the self - test process, please feel free to contact us for further information and to discuss your specific requirements. We look forward to working with you to meet your electrical testing needs.
References
- Electrical Testing Equipment Handbook
- Industry Standards for DC Dielectric Hipot Testing